How to Use Manual Capsule Filling Machines: Walkthrough & Guides
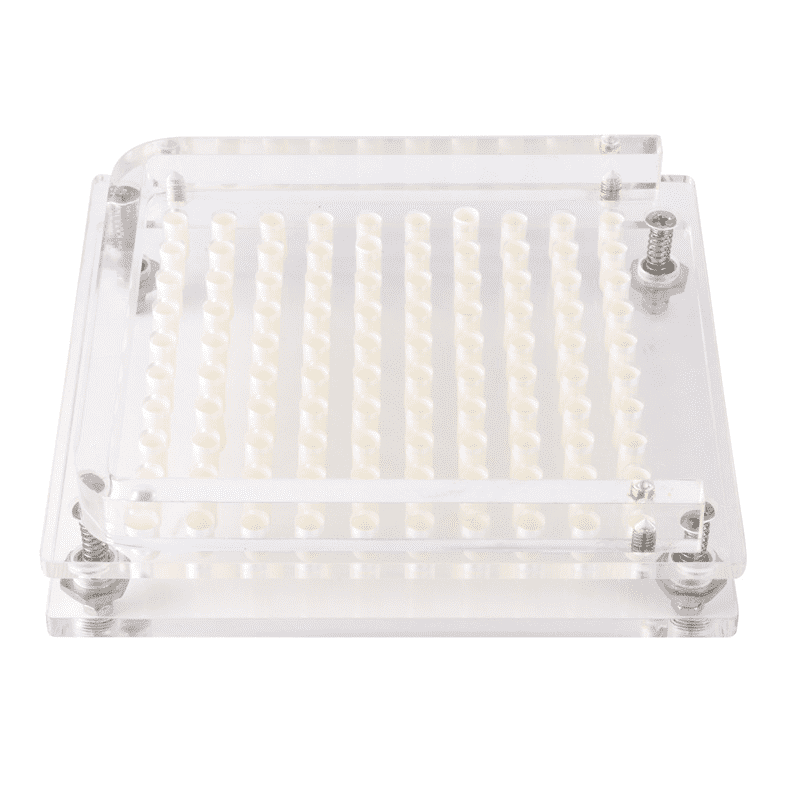
Are you confused about the manual capsule filling machine procedure? As you can see, a manual capsule filler could have 4 to 9 parts in total, which could perplex first buyers trying to assemble and use it.
Before diving into how to make capsules, you may want to make sense of the differences between various types of manual capsule fillers.
Generally, there are 2 types of manual encapsulation machines:
1. Manual capsule filler (used to fill separated capsules)
2. Manual semi-auto capsule filler (used to fill joined capsules)
If you're interested in how to use capsule filling machines, read the following guide:
How to use manual capsule filling machines to fill separated capsules?
Before starting the capsule filling process, you should clean the operating platform so your machine can be in the best working condition.
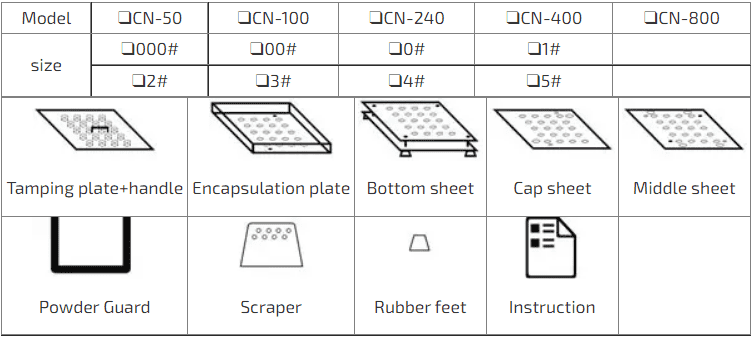
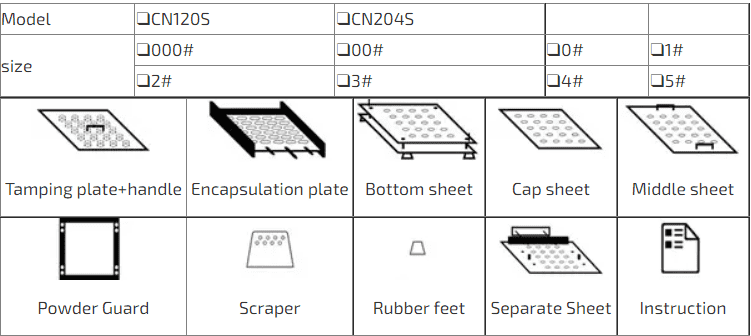
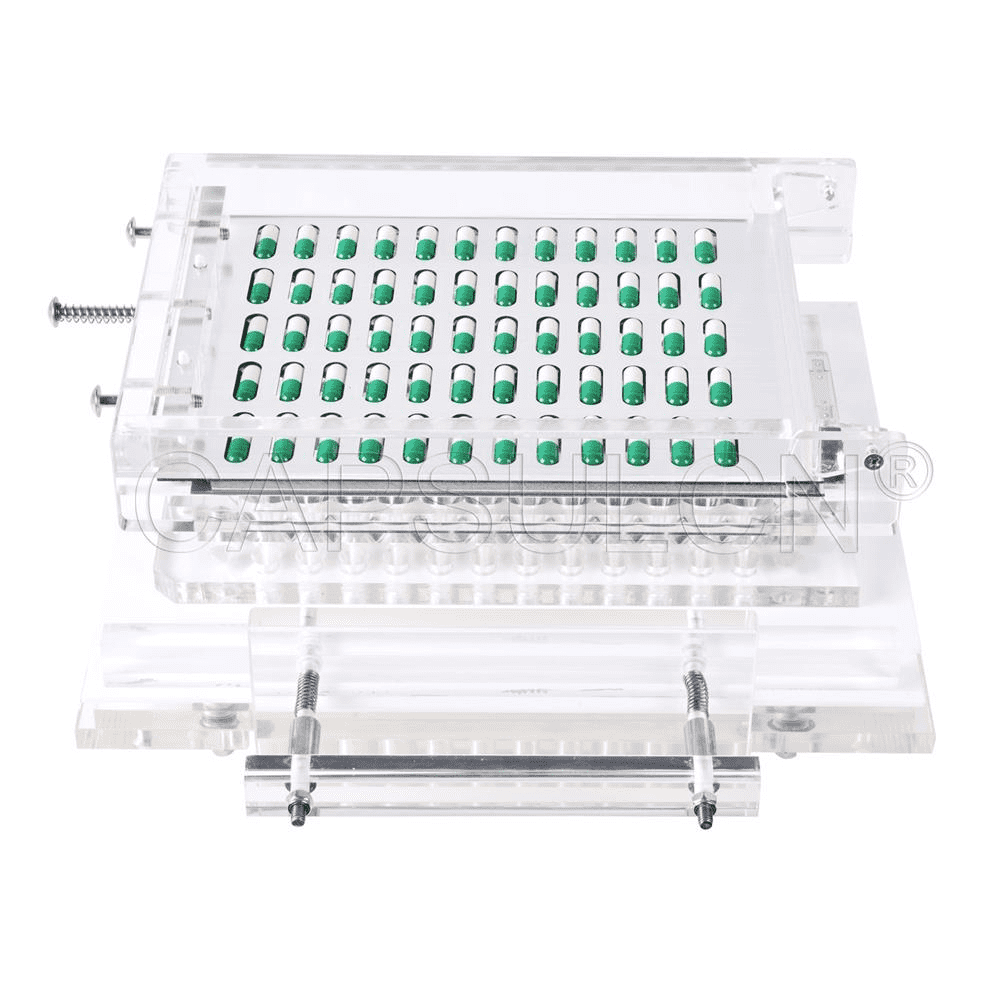
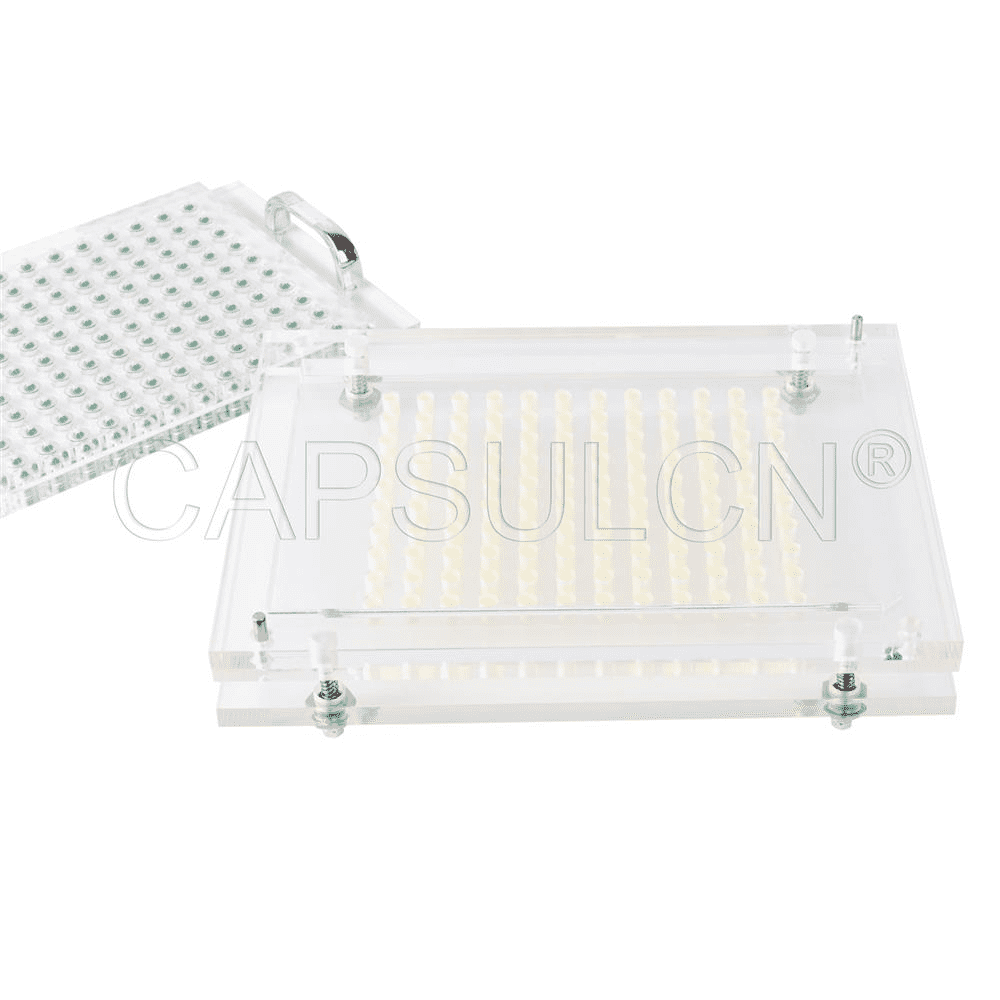
Then prepare the 8 parts except for the separate sheet: Cap sheet, middle sheet, encapsulation sheet (loader), body plate, tamping tool (tamper), powder guarder, scraper (spreader), and rubber feet.
Compared with the manual semi-auto capsule filler, since this machine is used to fill separated capsules, it doesn’t need the separating sheet to take apart the joined capsules.
If you have never heard of these parts, you may want to check this article so you will learn every detail about the manual capsule filling machine parts.
Now, let’s learn how to use manual capsule filling machines to fill separated capsules.
Step 1: Installation
- Take the tamping tool (used to compress the filled powder), its handle and screws, the body plate, and its rubber feet.
- Then fix the handle to the tamper with the screws. After that, you must fix the four rubber feet to the underside of the body plate.
Step 2: Loading caps
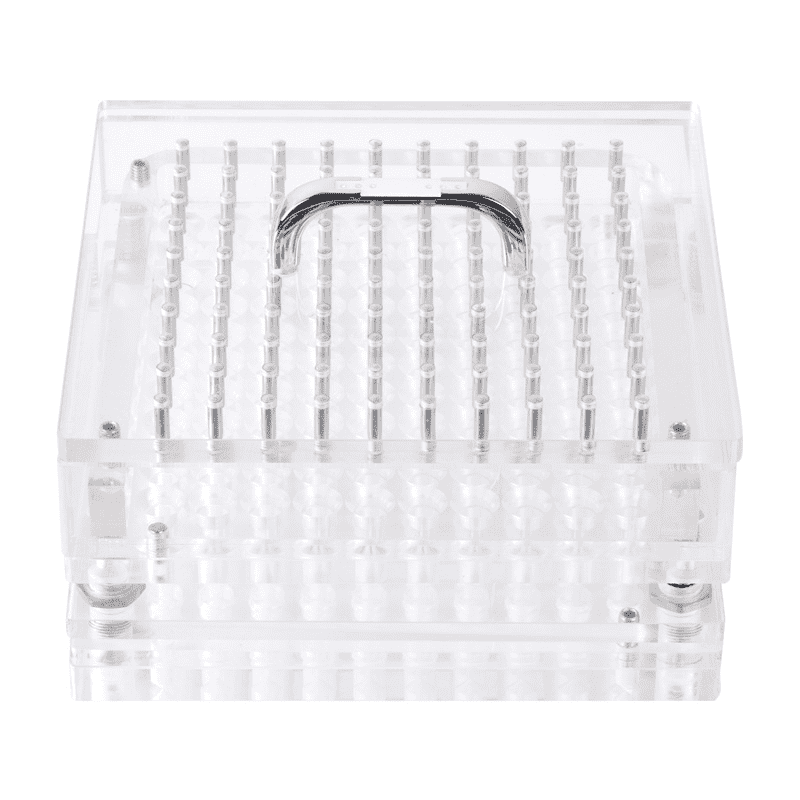
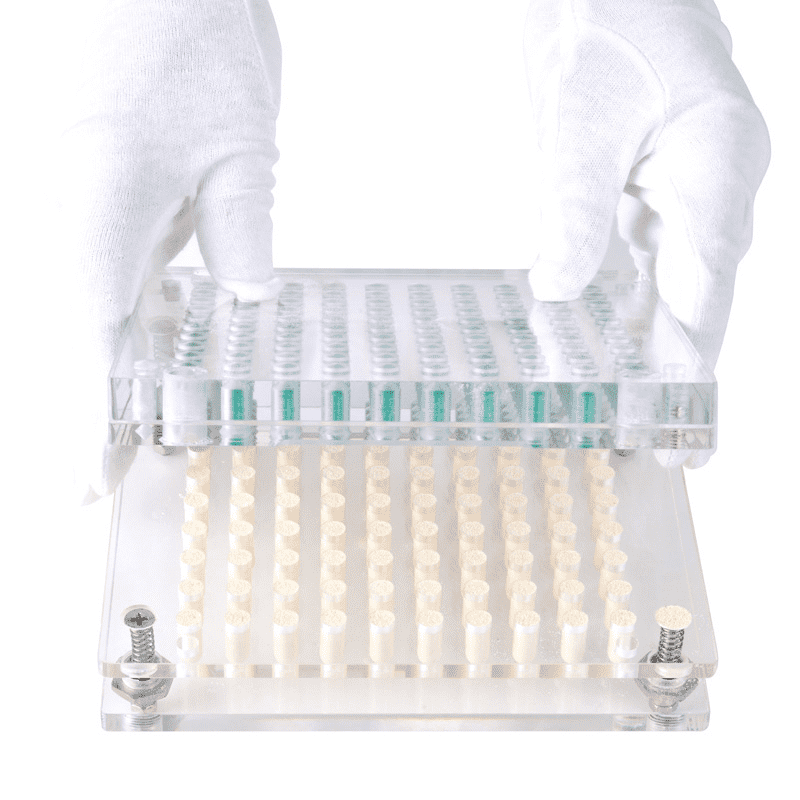
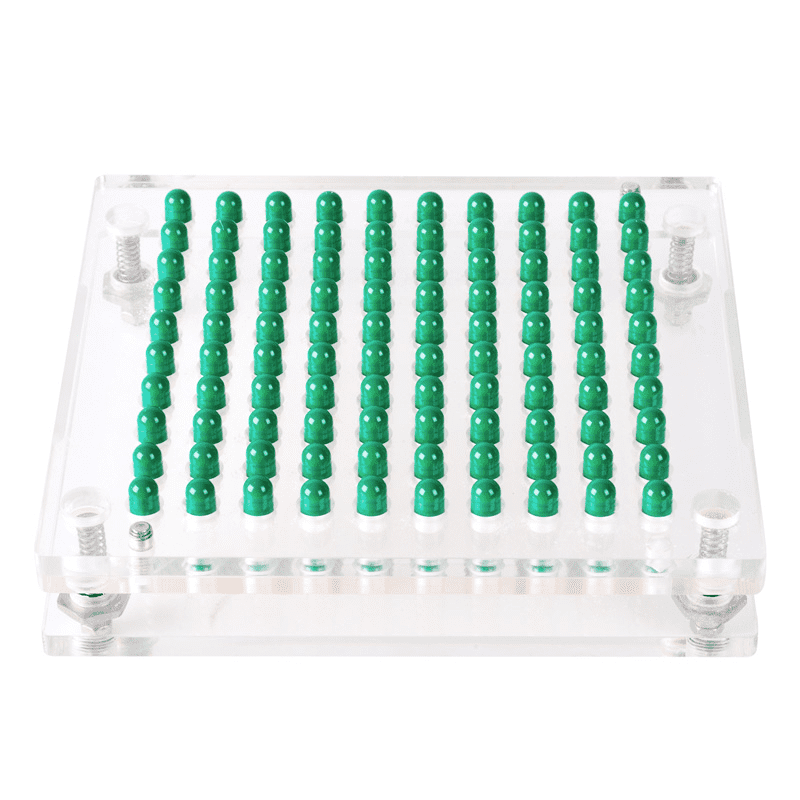
- Take the cap sheet (used to load the capsules caps) and place it on the dry surface. Then place the encapsulation sheet on top of the cap sheet with the 4 pegs fixed into the 4 holes.
- After the preparation, pour capsule tops into the cap sheet, and the encapsulation sheet will help avoid spillage. Then gently shake the tops into the holes of the cap sheet.
- When all the holes are filled with caps, pour out the excess tops. Then remove the encapsulation sheet and reverse the caps that are upside down.
Step 3: Loading bodies
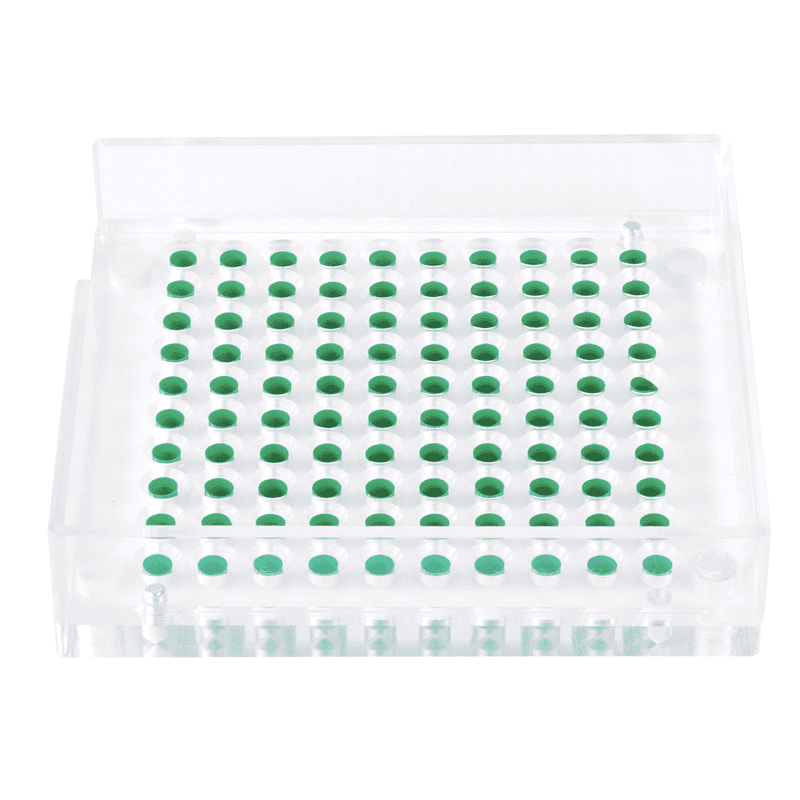
- Take the bottom sheet (used to load the body of capsules). Place the encapsulation sheet. Then fix the encapsulation sheet to the bottom sheet with the pegs fitted into the holes.
- Pour capsule bodies into the bottom sheet. Shake as before to fill the holes and pour off excess capsule bodies.
- Remove the encapsulation sheet. And see if capsule bodies are sitting in the holes upside down. Then press one side of the bottom sheet to pluck those in the wrong direction and turn them over.
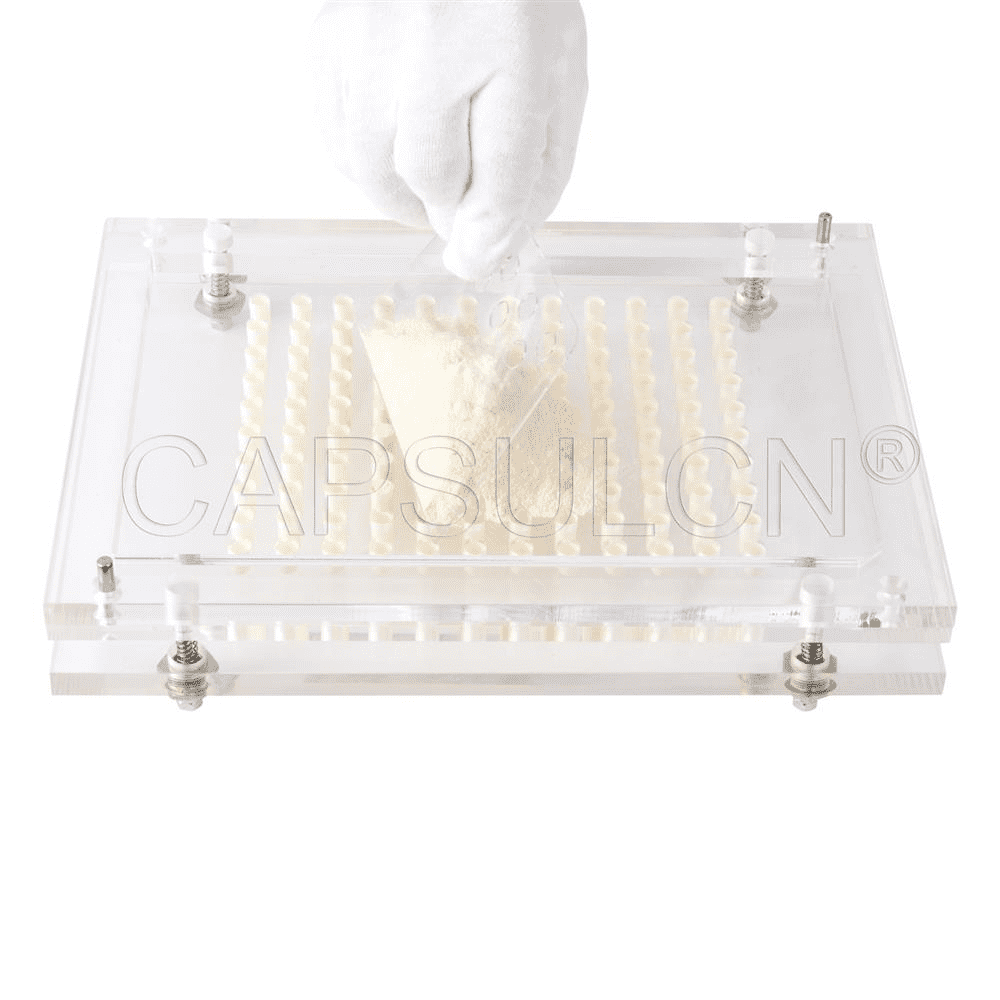
Step 4: Filling bodies
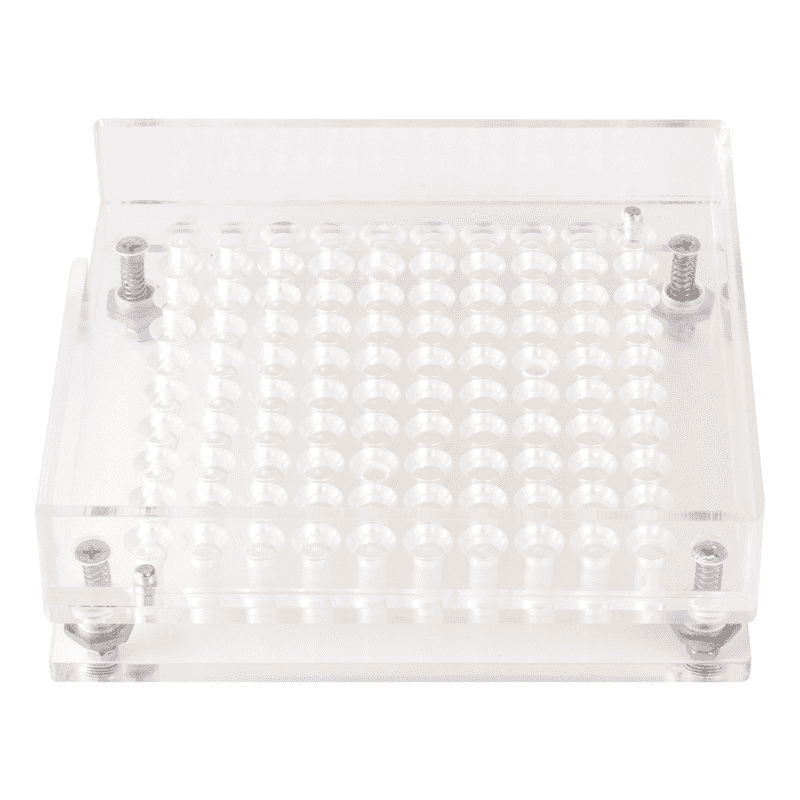
- Fix the powder guard (used to prevent spillage when filling) to the bottom sheet.
- Use a spoon to pour the powder over the bottom sheet. And then, use the scraper (spreader) to fill the capsule bodies evenly.
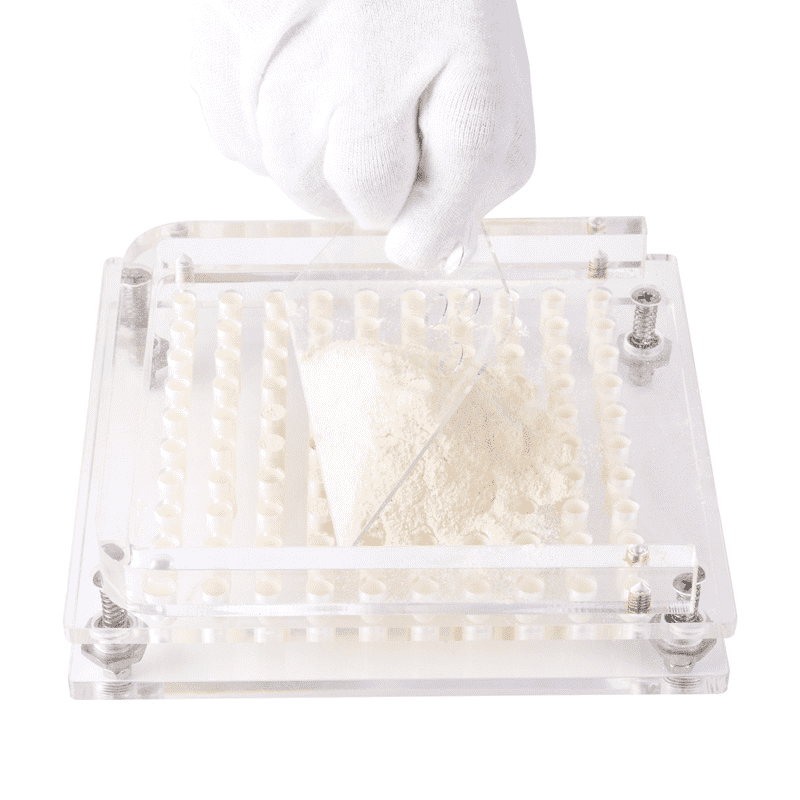
- Remove the powder guard and use the tamping tool to compress the powder, so that the bodies can spare more space for filling the powder.
- Repeat the previous procedure: fix the powder guard, fill the capsule bodies and compress the powder.
- When the bodies are fully filled, remove the powder guard, and use the spreader to scrape off the excess powder.
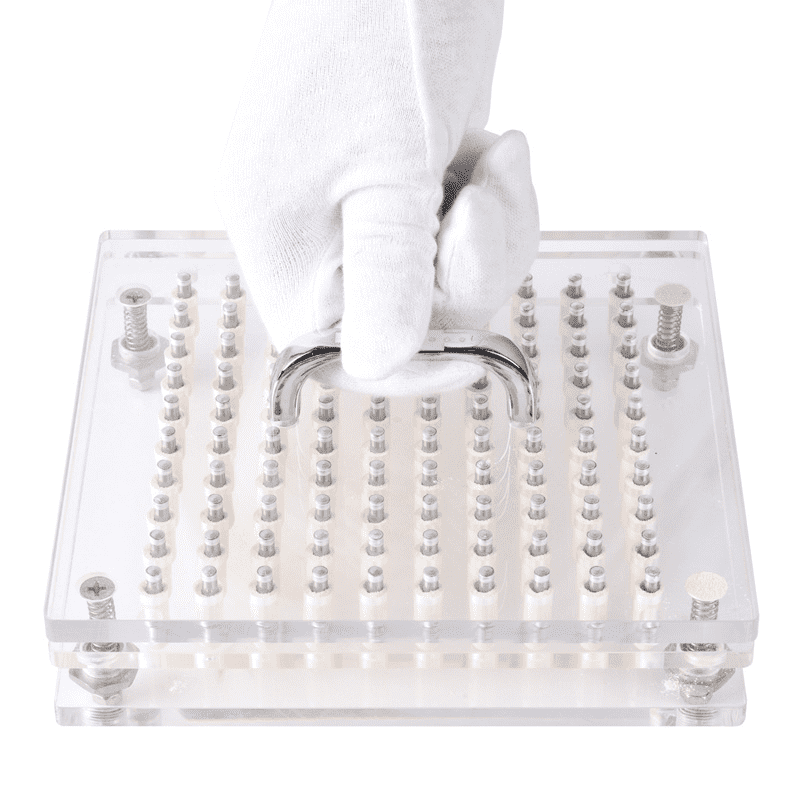
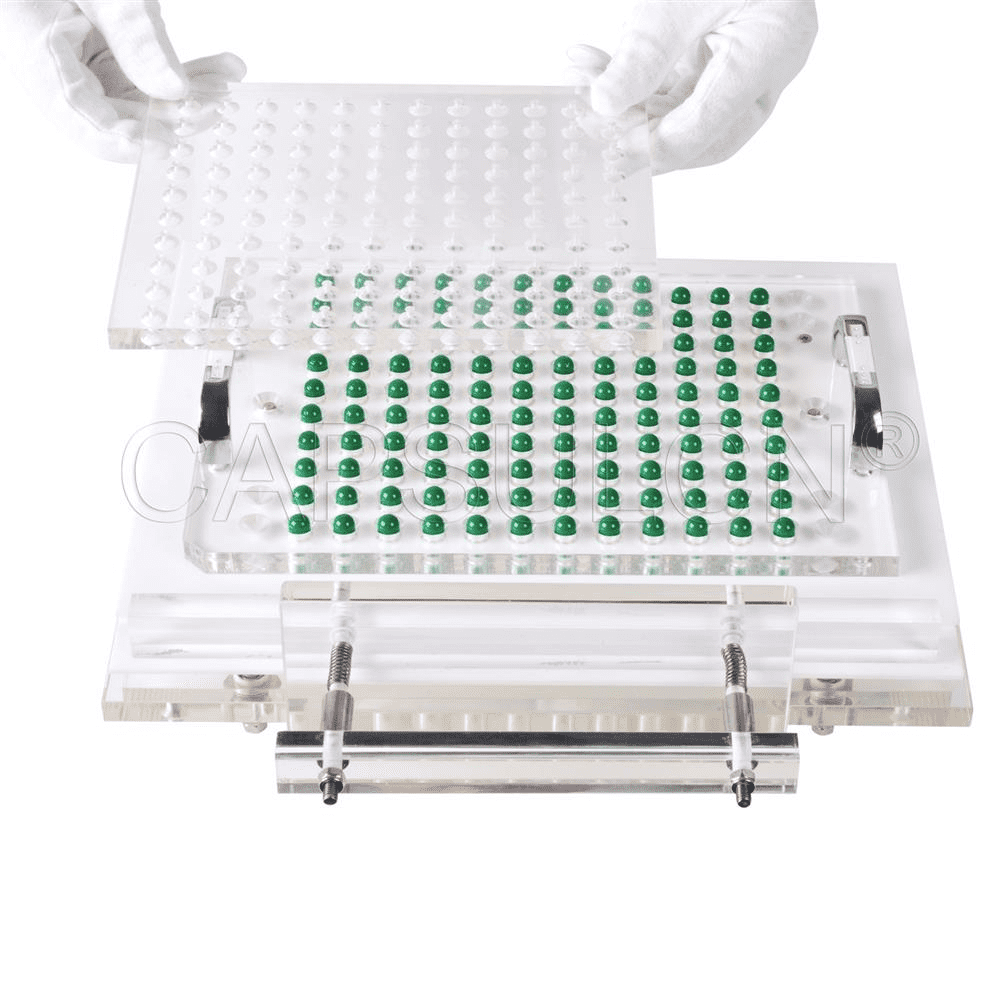
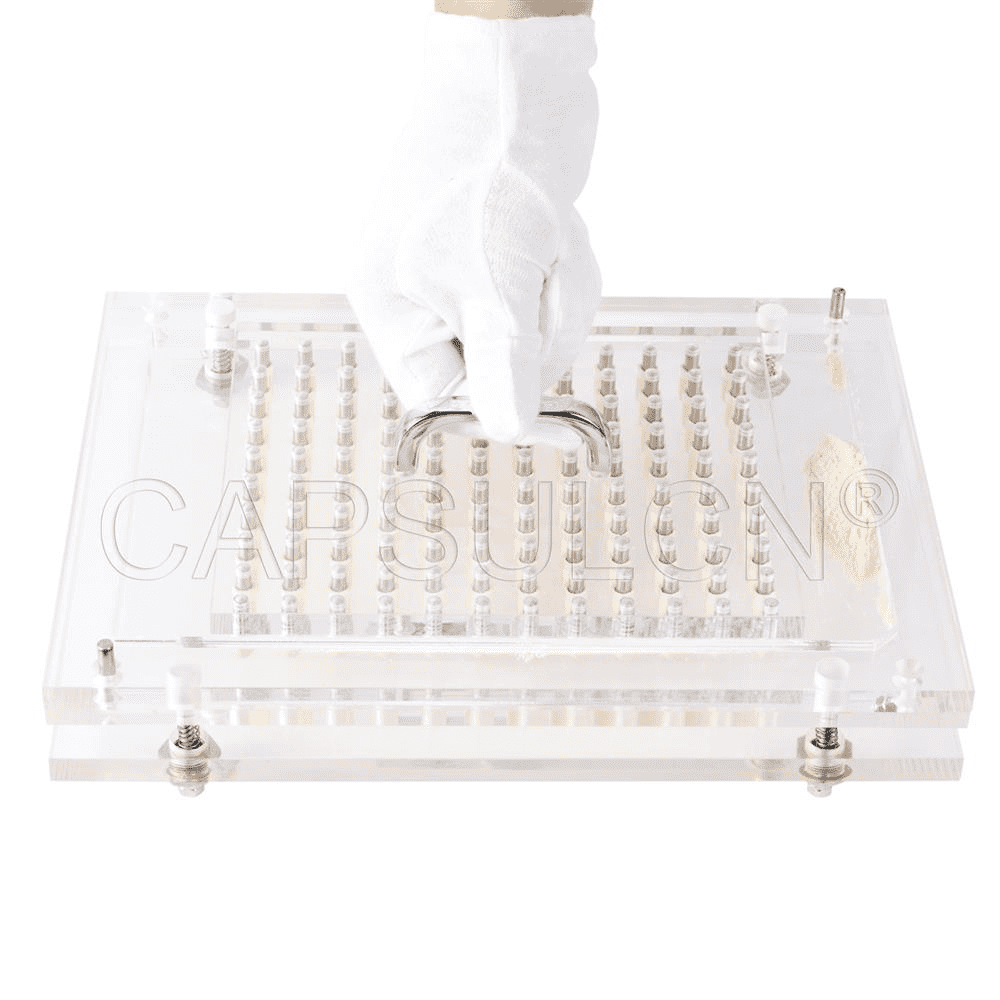
Step 5: Locking the capsules
- Take out the middle sheet (placed between the cap sheet and the bottom sheet when locking).
- Place the middle sheet on top of the cap sheet. You need to make sure the 4 pegs of the middle sheet are fitted into the 4 holes of the bottom sheet. Further, take care that the holes of the middle sheet top are slightly larger than the holes underneath.
- Take the cap sheet + the middle sheet over and fix them to the bottom sheet. Then shake the cap sheet + the middle sheet backward and forwards so that the capsules can be connected gently.
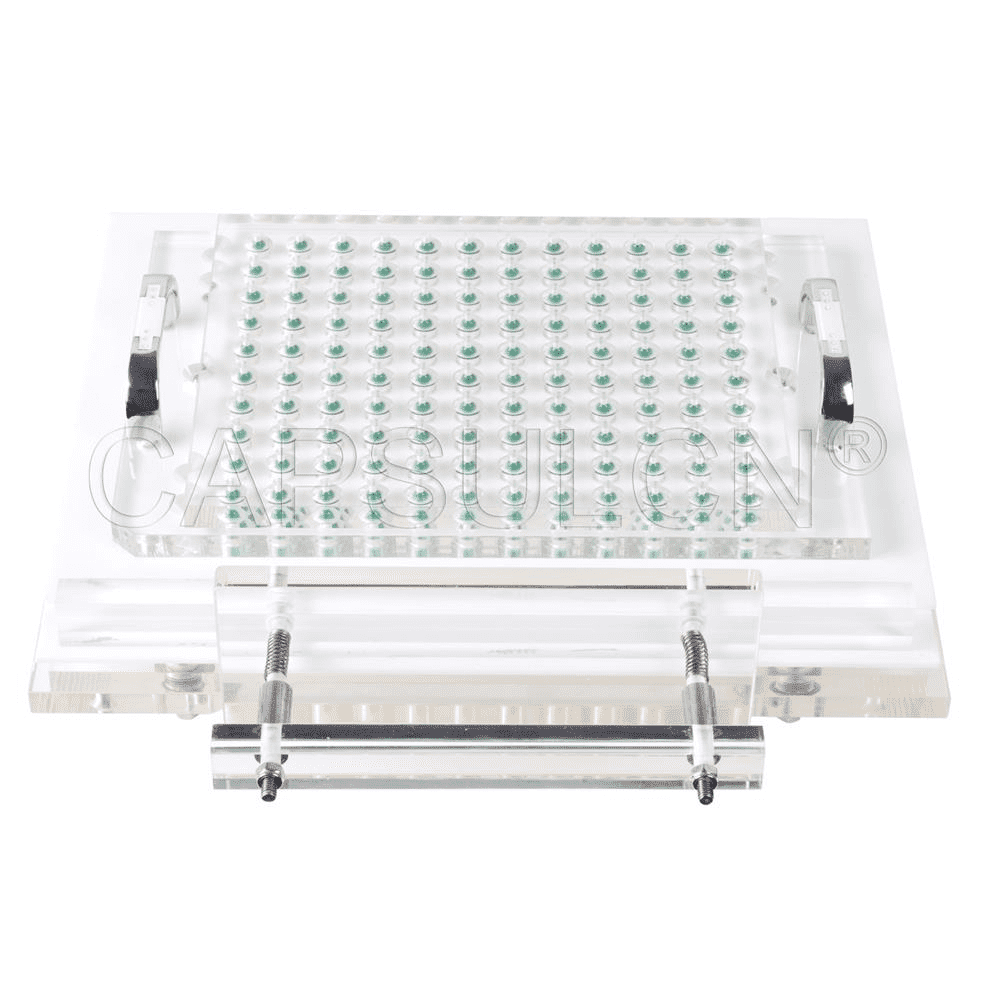
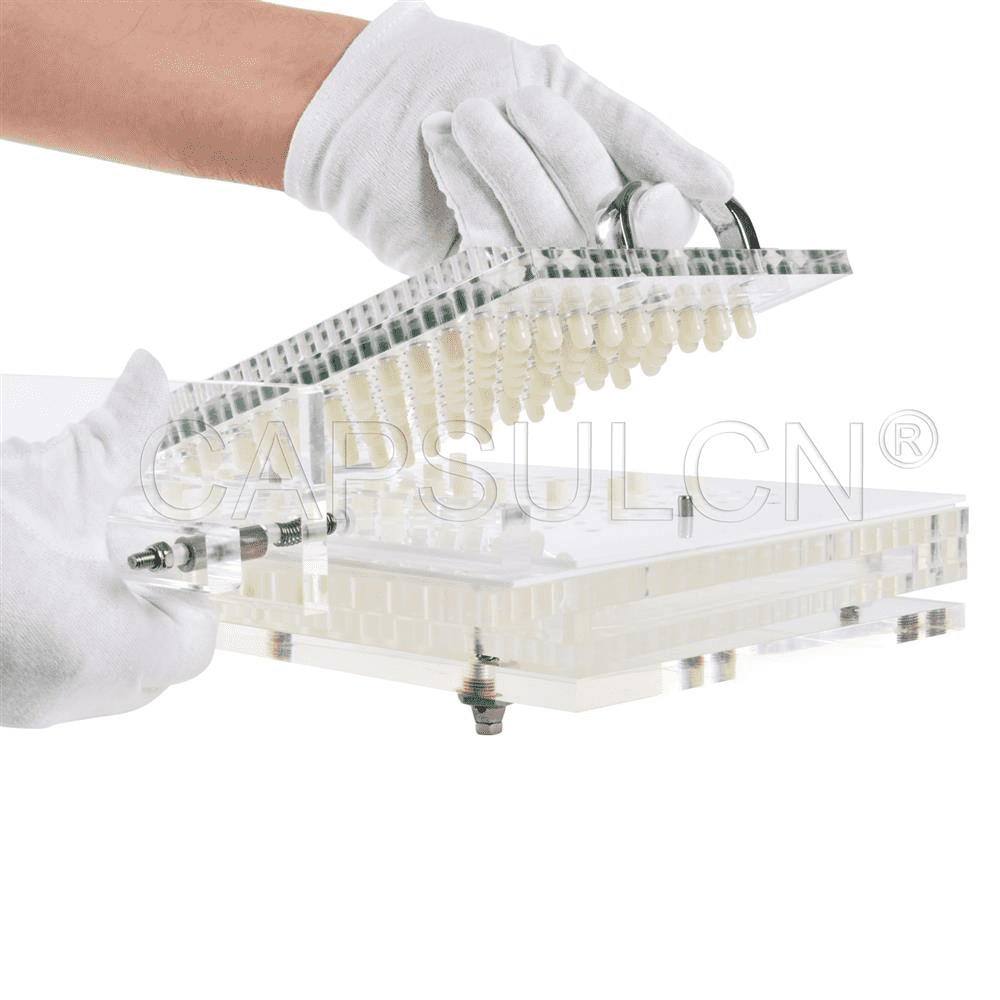
- When you feel that the capsules are in the correct position, exert pressure downwards with your two hands overlapped. Then turn the whole machine over and push downwards again, then the capsules will be properly locked.

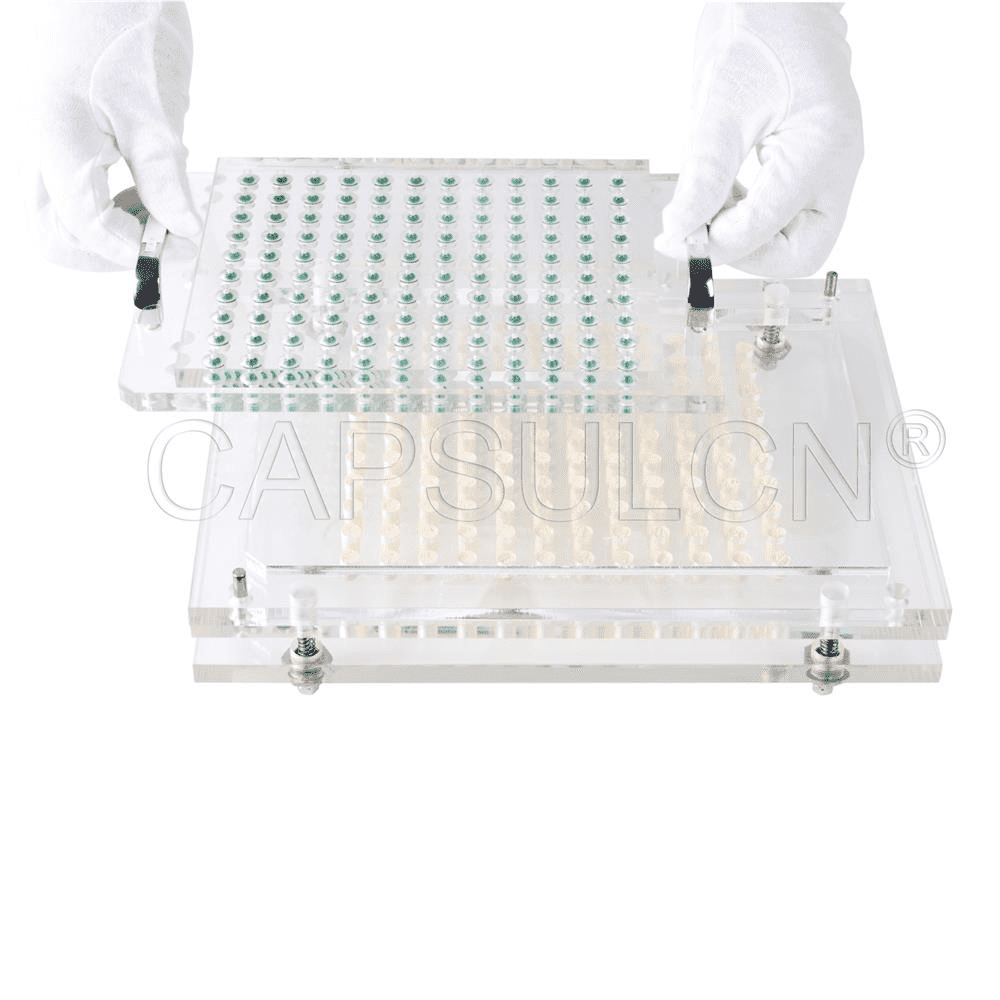
- Lastly, remove the cap sheet, take out the middle sheet, and the capsules are placed in the holes of the middle sheet. Then you can feel free to check the finished capsules.
How to use semi-auto manual capsule filling machines to fill joined capsules?
If you want to know how to use manual capsule filling machines of this type, you are expected to learn their parts first.
As we have mentioned before, semi-auto manual encapsulators can fill joined capsules, for they feature a sheet that can separate capsules by a movable handle.
So the separate sheets distinguish these machines from the common types since they have achieved a certain level of automation.
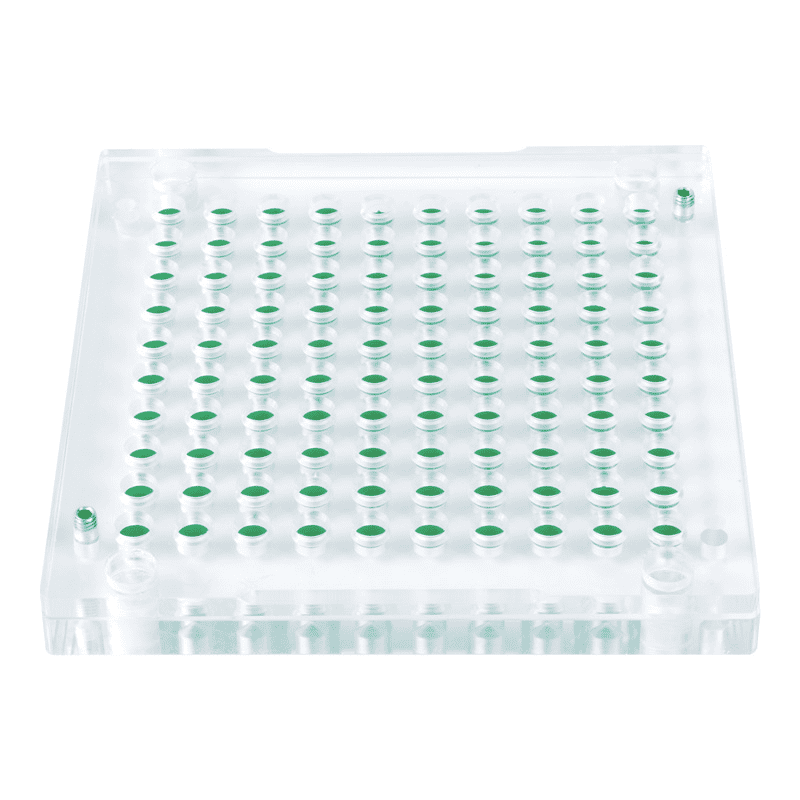
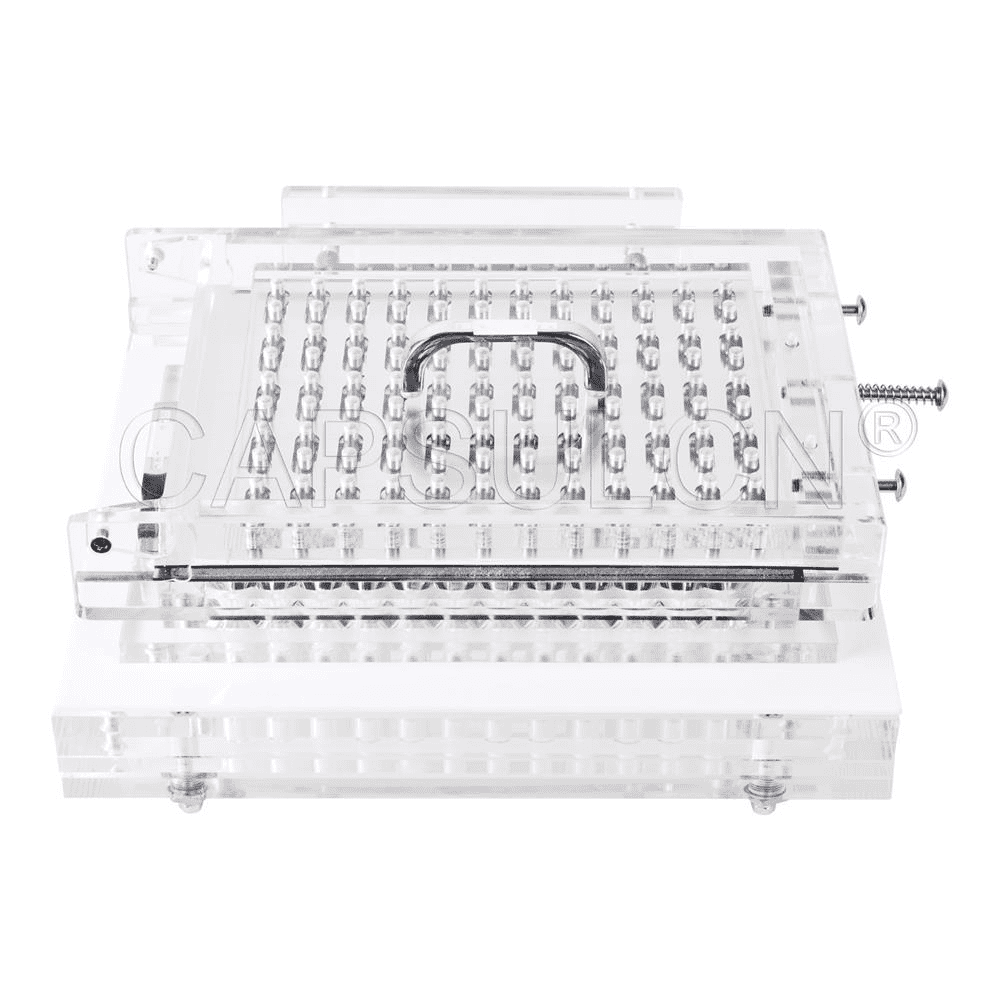
On top of that, the encapsulation plate (loader made of 304 stainless steel) also has an ingenious design. You only need to press the button, and then the capsules will fall through the holes and be in the right position.
Generally, these manual capsule fillers contain 9 parts: tamping plate (used to compress powder), loader (encapsulation plate), bottom sheet, cover plate (cap sheet), positioning sheet (middle sheet), powder guard, scraper, rubber feet, and separate sheet.
Okay, without further ado, let’s dive into the semi-auto manual capsule filling machine procedure.
Step 1: Installation
- Take the bottom sheet, and place it on the dry surface.
- Fix the powder guard onto the bottom sheet with a separating plate above both of them.
- Then fix the positioning sheet onto the separating plate.
Step 2: Loading capsules
- After the preparation, you can feel free to pour a generous amount of capsules into the loader.
- Then gently shake the capsules into the holes of the loader.
- Open the guard of the loader, and pour off excess capsules. Then close the guard again.
- After that, fix the loader to the set installed before (positioning sheet, separating sheet, bottom sheet).
- After the loader has been firmly fixed onto the set, press the button on the sheet, then all the capsules will fall through the holes automatically. And now, the capsules are sitting in the holes of the positioning plate.

Step 3: Separating capsules
- After loading, remove the loader and gently place the cover plate on the positioning plate, so the capsule caps can be covered completely.
- After covering, use one hand to grip the handle of the positioning plate, and use another to pull its acrylic handle. Then raise the positioning plate by lifting its handle.
Step 4: Filling bodies
- After separating, remove the positioning plate with the cover plate, and place them on one side.
- Remove the separating plate since the process of separation has finished.
- Note that at this time, the caps of capsules are all in the positioning plate while the bodies remain on the bottom plate.
- Then pour a generous amount of powder into the bottom plate. Use the spreader to fill the capsule bodies. And then, use the tamping tool to compress the powder.
- Repeat the previous procedure until the capsule bodies are fully filled. Then remove the powder guard and the excess powder.
Step 5: Locking capsules
- After pouring off excess, fix the powder guard onto the bottom plate again. Then place the positioning plate (covered with the cover plate) onto the powder guard.
- To connect the capsules properly, gently jiggle the positioning sheet upwards and downwards.
- Press the positioning plate downwards with your two hands overlapped.
- After locking, remove the positioning plate with the finished capsules in its holes. And turn it over to release the capsules.
The bottom line
Now you’ve mastered how to use manual capsule filling machines. In terms of manual capsule filler selection, there are many tricks as well. Check this post, you will learn the features of a quality manual encapsulator, and find your ideal fillers successfully.
In summary, manual and semi-auto capsule fillers are hand-operated capsule filling machines. They are suitable for small and medium-sized filling.
And keep in mind that manual capsule fillers can be used to fill both joined and separate capsules. Generally, the semi-auto manual ones are more efficient, while the manual capsule fillers are more cost-effective.
Leave your comment
Also Offers


Containment Automatic Capsule Filling Machine SFK-703

Fully Automatic Dosator Capsule Filling Machine CZ-40


Our Team
As an expert in the pharmaceutical and pharmaceutical packaging industry, iPharMachine has provided solutions for hundreds of pharmaceutical and health product manufacturers for 17 years. By visiting customers, we get good reviews from our customers.
- info@ipharmachine.com
- English Español Deutsche